NOPROXY
Topics in this section,
In this section, you are going to learn
Terminology
Version Info
TLS version |
Authentication |
Encryption |
Encryption Algorithm |
No.of frames during connection |
Valid |
Comments |
|
1.2 |
X.509 Server Certificate+signature |
TLS_RSA_WITH_AES_128_CBC_SHA |
AES-128 in CBC mode |
10 |
NO |
Handshake failure |
|
1.2 |
X.509 Server Certificate+signature |
TLS_RSA_WITH_AES_256_CBC_SHA |
AES-256 in CBC mode |
10 |
NO |
Handshake failure |
|
1.2 |
X.509 Server Certificate+signature |
TLS_RSA_WITH_AES_128_CBC_SHA256 |
AES-128 in CBC mode |
10 |
NO |
Handshake failure |
|
1.2 |
X.509 Server Certificate+signature |
TLS_RSA_WITH_AES_256_CBC_SHA256 |
AES-256 in CBC mode |
10 |
NO |
Handshake failure |
|
1.2 |
X.509 Server Certificate+signature |
TLS_DHE_RSA_WITH_AES_128_CBC_SHA |
AES-128 in CBC mode |
10 |
NO |
Handshake failure |
|
1.2 |
X.509 Server Certificate+signature |
TLS_DHE_RSA_WITH_AES_256_CBC_SHA |
AES-128 in CBC mode |
10 |
NO |
Handshake failure |
|
1.2 |
X.509 Server Certificate+signature |
TLS_DHE_RSA_WITH_AES_128_CBC_SHA256 |
AES-128 in CBC mode |
10 |
NO |
Handshake failure |
|
1.2 |
X.509 Server Certificate+signature |
TLS_DHE_RSA_WITH_AES_256_CBC_SHA256 |
AES-128 in CBC mode |
10 |
NO |
Handshake failure |
|
1.2 |
X.509 Server Certificate+signature |
TLS_ECDHE_RSA_WITH_AES_128_CBC_SHA |
AES-128 in CBC mode |
10 |
NO |
Handshake failure |
|
1.2 |
X.509 Server Certificate+signature |
TLS_ECDHE_RSA_WITH_AES_256_CBC_SHA |
AES-128 in CBC mode |
10 |
NO |
Handshake failure |
|
1.2 |
X.509 Server Certificate+signature |
TLS_ECDHE_RSA_WITH_AES_128_CBC_SHA256 |
AES-128 in CBC mode |
10 |
NO |
Handshake failure |
|
1.2 |
X.509 Server Certificate+signature |
TLS_ECDHE_RSA_WITH_AES_256_CBC_SHA384 |
AES-128 in CBC mode |
10 |
NO |
Handshake failure |
|
1.2 |
X.509 Server Certificate+signature |
TLS_ECDHE_RSA_WITH_AES_128_GCM_SHA256 |
AES-128 in CBC mode |
10 |
NO |
Handshake failure |
|
1.2 |
X.509 Server Certificate+signature |
TLS_ECDHE_RSA_WITH_AES_256_GCM_SHA384 |
AES-128 in CBC mode |
10 |
NO |
Handshake failure |
|
1.2 |
X.509 Server Certificate+signature |
TLS_ECDHE_ECDSA_WITH_CHACHA20_POLY1305_SHA256 |
ChaCha20 stream cipher + Poly1305 MAC |
10 |
NO |
Handshake failure |
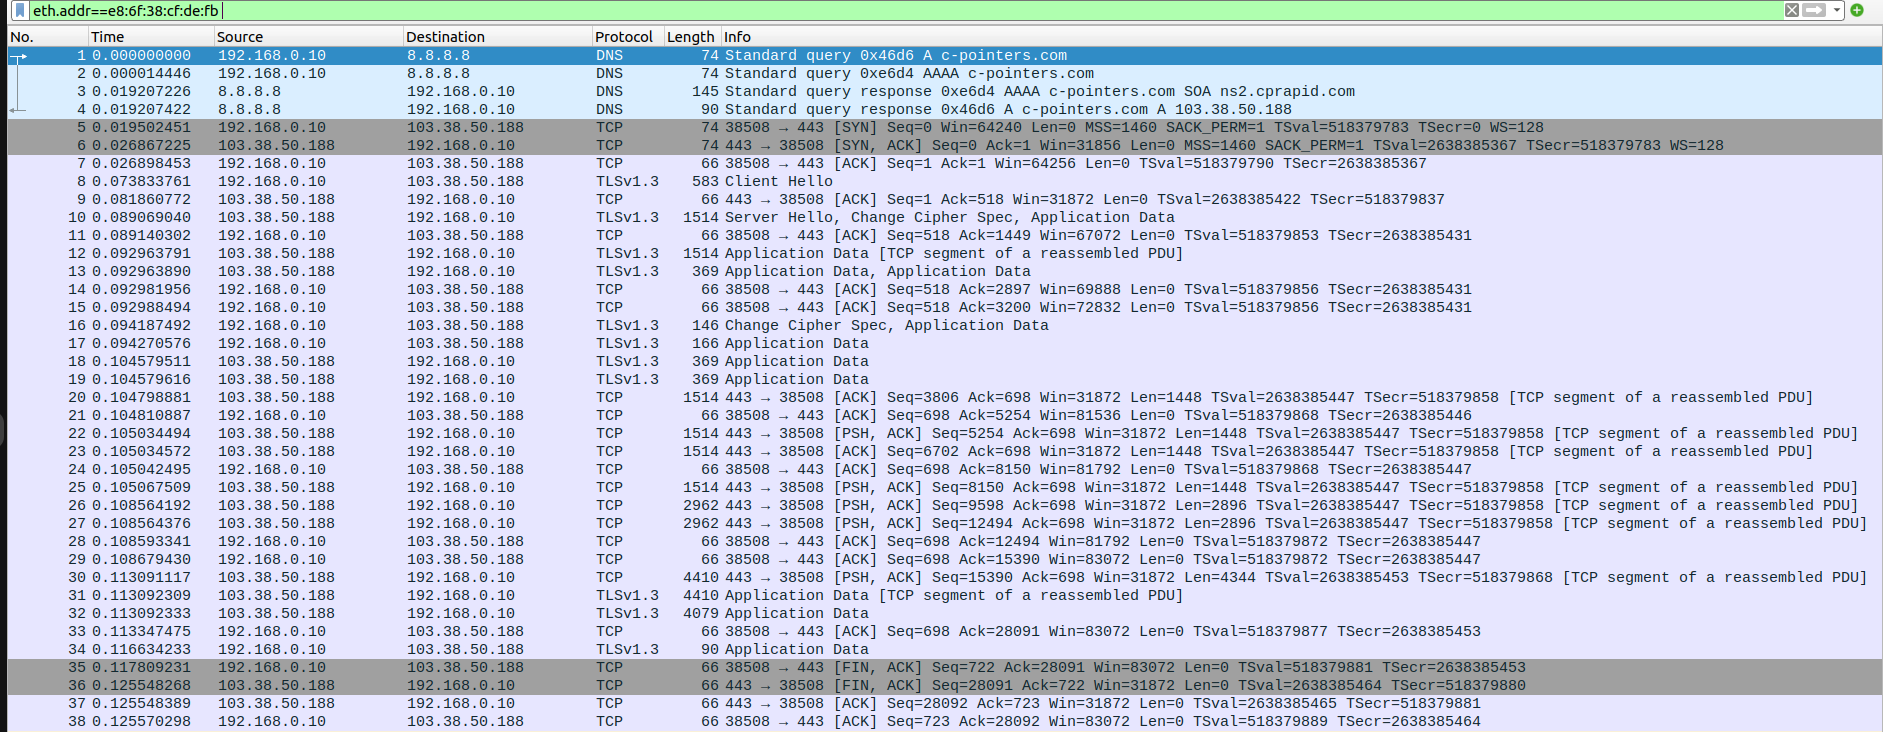
test:~$ curl https://c-pointers.com
Expected output:The HTML source code of the webpage hosted at https://c-pointers.com
Step-1 : wireshark captures
client side
Step-2 : screenshots
client side
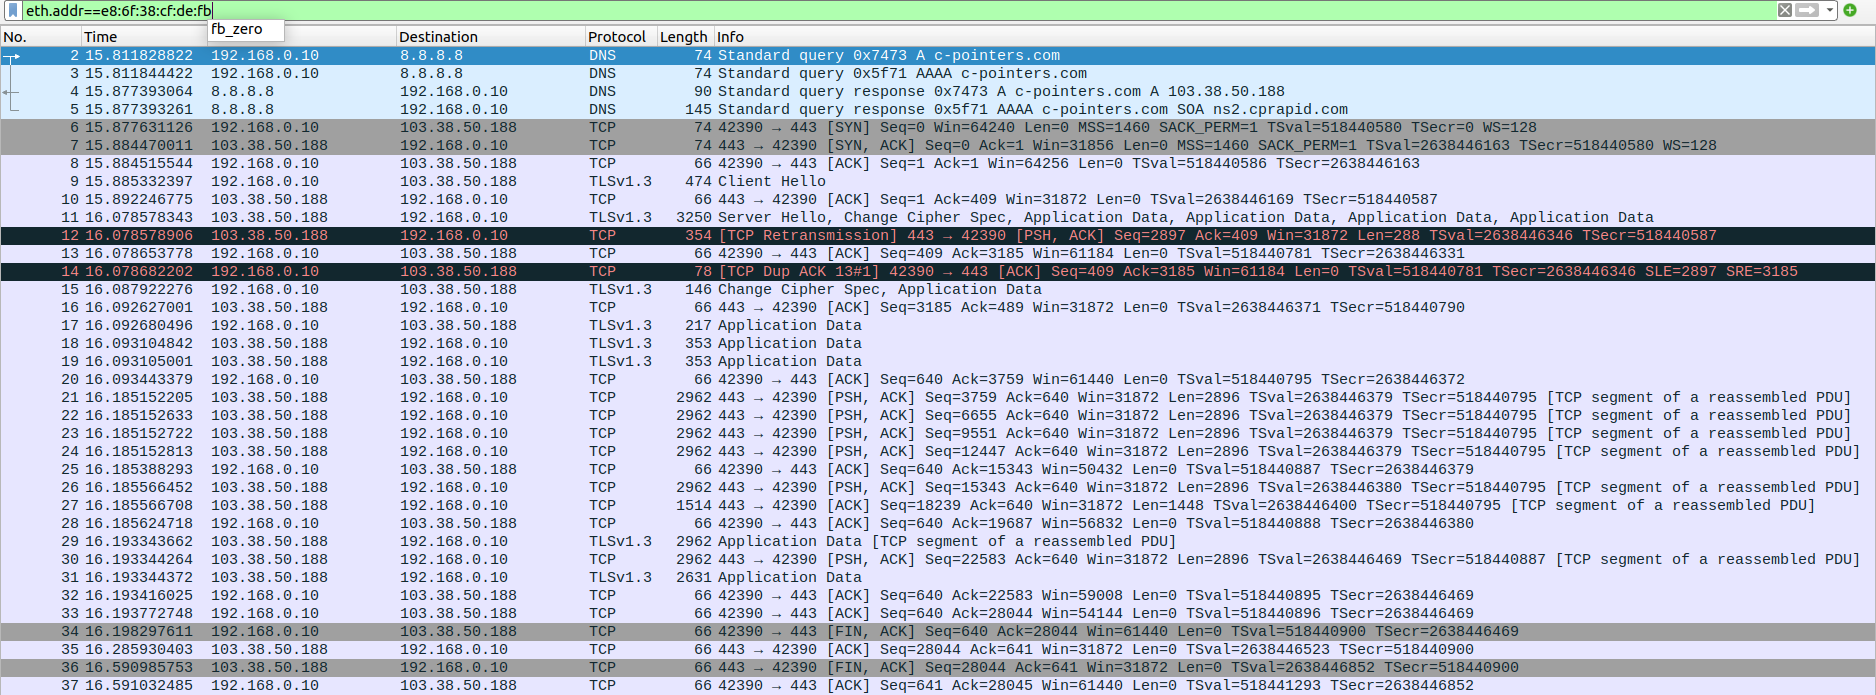
test:~$ wget https://c-pointers.com
Expected output:The HTML content of the webpage at https://c-pointers.com
Step-1 : wireshark captures
client side
Step-2 : screenshots
client side
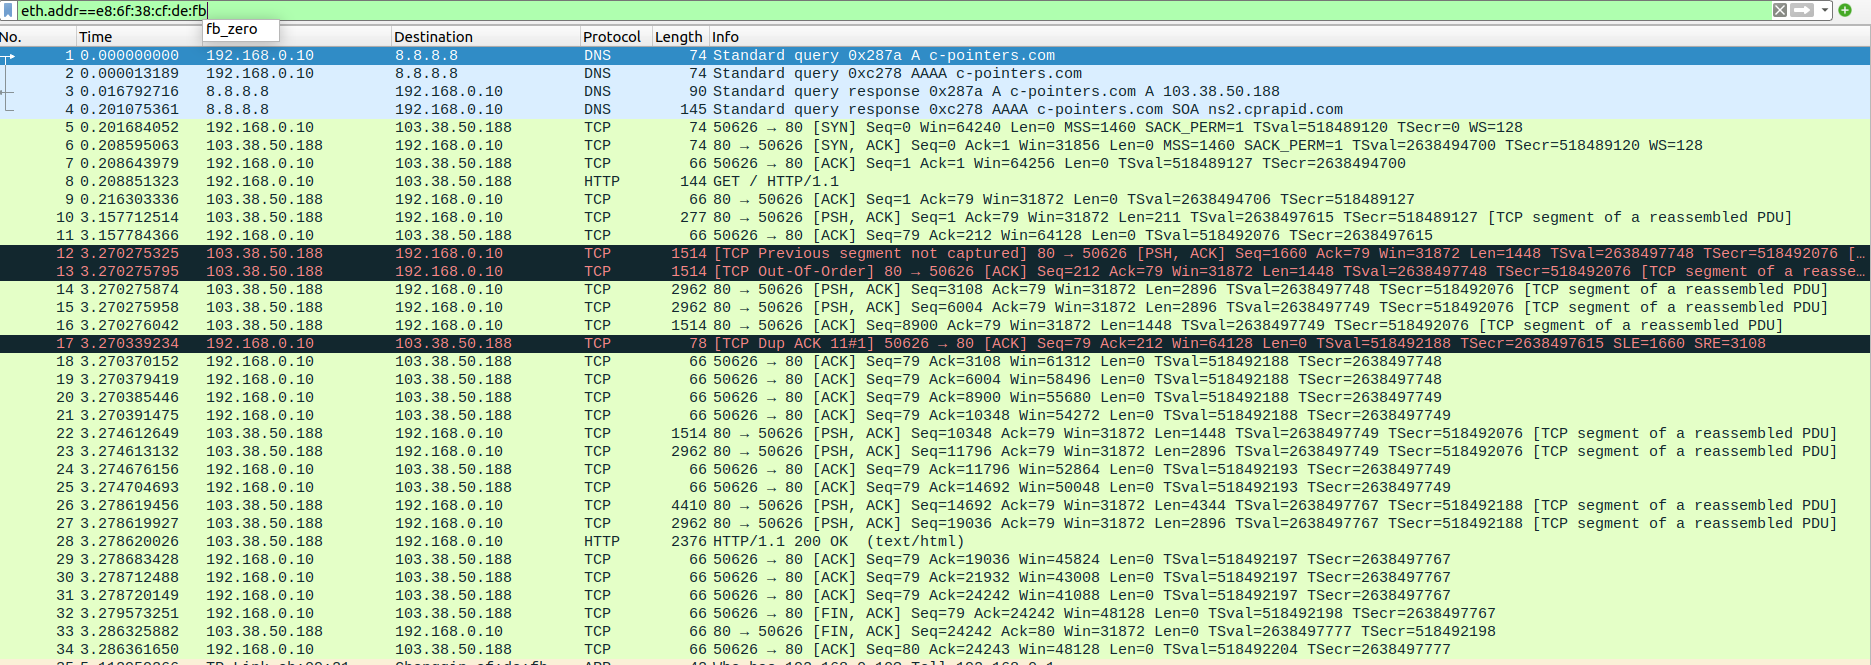
test:~$ curl http://c-pointers.com
Expected output:The HTML source code of the webpage hosted at http://c-pointers.com
Step-1 : wireshark captures
client side
Step-2 : screenshots
client side
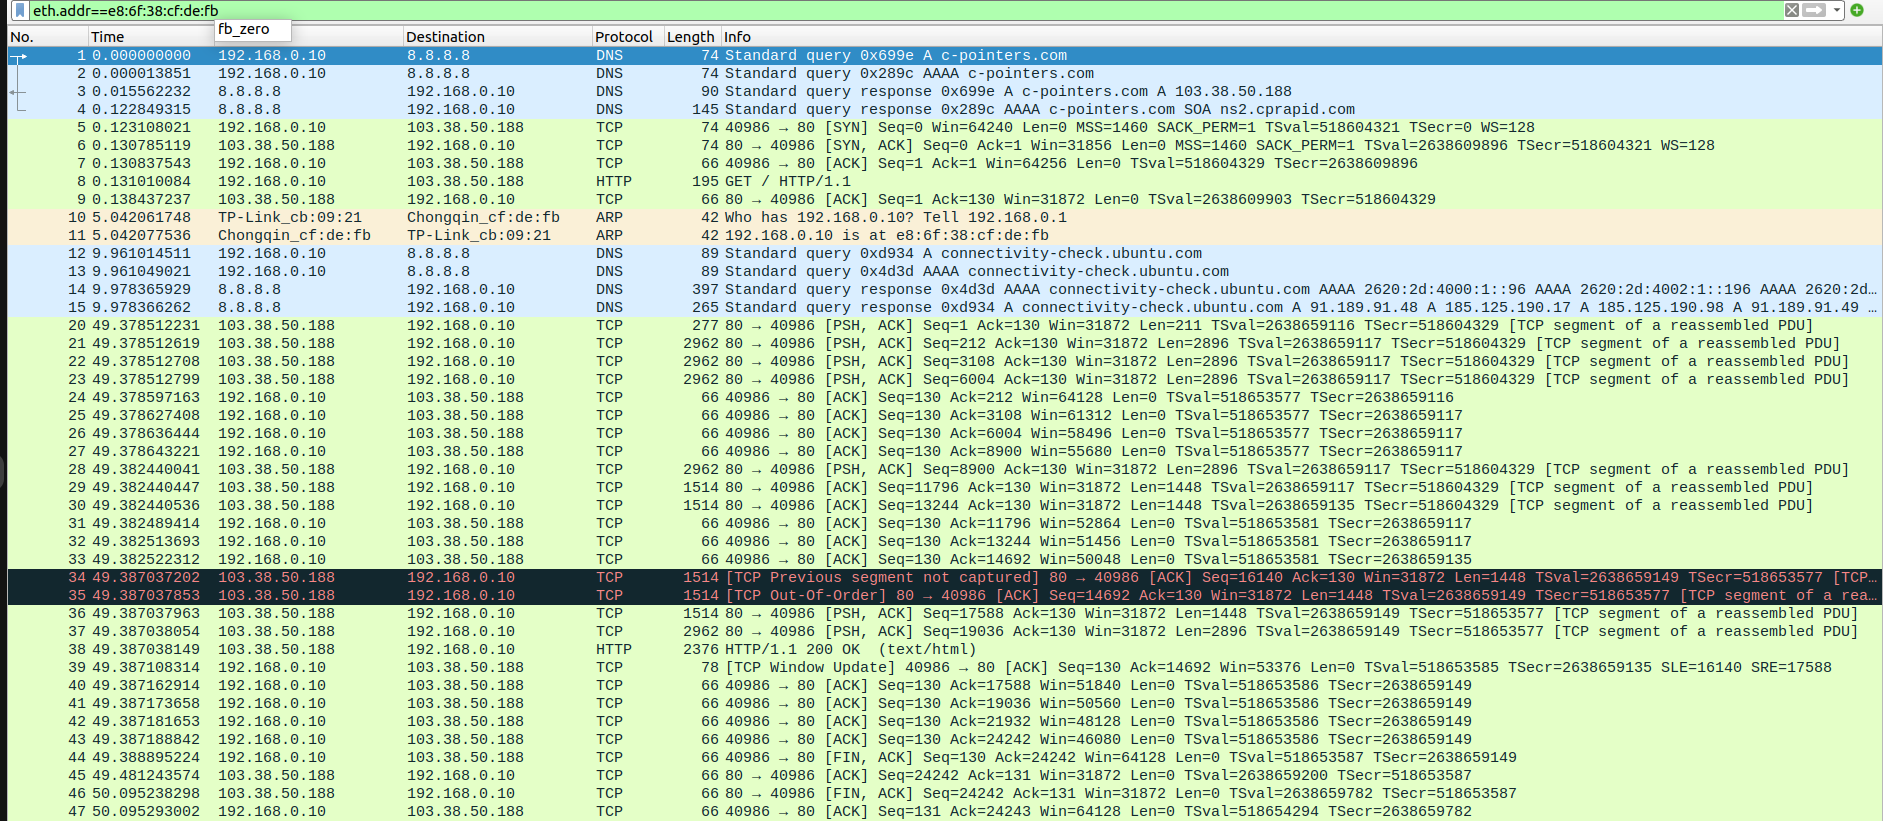
test:~$ wget http://c-pointers.com
Expected output:The HTML content of the webpage at http://c-pointers.com
Step-1 : wireshark captures
client side
Step-2 : screenshots
client side
Step-1: Install Apache Web Server
test:~$ sudo apt update
test:~$ sudo apt install apache2 -y
Step-2: Adjust the Firewall
1.Check available apache UFW profiles:
test:~$ sudo ufw app list
Available applications:
Apache
Apache Full
Apache Secure
2.You want to allow both http and https,so Apache Full is a good choice.
test:~$ sudo ufw allow 'Apache Full'Step-3: Verify apache service
test:~$ sudo systemctl start apache2
test:~$ sudo systemctl enable apache2
test:~$ sudo systemctl status apache2
Step-4: Test your Webserver
Open your webserver and navigate to your server’s IP address like http://10.91.239.125
To check in terminal also
test:~$ curl -v http://10.91.239.125You should see the default apache ubuntu page.This confirms that apache is installed and running correctly.
Note
10.91.239.125 is the your’s server IP address of Ubuntu Machine.
Step-5: Lets create your own domain.com
Create a directory for your domain:
test:~$ sudo mkdir -p /var/www/myuniqueproxy.com/htmlNote
myuniqueproxy.com is my own domain.com.You can replace with this your’s actual domain.com.
Create a sample index.html file
test:~$ sudo nano /var/www/myuniqueproxy.com/html/index.html
<!DOCTYPE html>
<html>
<head>
<title>Welcome to myuniqueproxy.com domain</title>
</head>
<body>
<h1>Hello from my own web server!</h1>
<p>This page is hosted on Apache running on Ubuntu.</p>
</body>
</html>
Save the file (Ctrl+O, Enter, Ctrl+X).
Note
You want to add some more context.You can add in index.html file.
Step-6: Set Proper permissions
test:~$ sudo chown -R www-data:www-data /var/www/myuniqueproxy.com/html
test:~$ sudo chmod -R 755 /var/www/myuniqueproxy.com
Step-7: Enable SSL module and default SSL site
test:~$ sudo a2enmod ssl
test:~$ sudo a2ensite default-ssl
test:~$ sudo systemctl reload apache2
Step-8: Generate a Self-Signed SSL Certificate
1.Create a directory to store your certificate
test:~$ sudo mkdir -p /etc/apache2/ssl
2.Now generate the certificate and private key
test:~$ sudo openssl req -x509 -nodes -days 365 -newkey rsa:2048 -keyout /etc/apache2/ssl/apache-selfsigned.key -out /etc/apache2/ssl/apache-selfsigned.crt
Note
You will be prompted to enter values like country, state, etc.Common name section you enter your server IP address.These will appear in your certificate.
Step-9: Configure Apache to Use Your Certificate
Edit the default SSL site:
test:~$ sudo nano /etc/apache2/sites-available/default-ssl.conf
<IfModule mod_ssl.c>
<VirtualHost _default_:443>
ServerAdmin webmaster@localhost

DocumentRoot /var/www/myuniqueproxy.com/html

# ServerName is optional for IP-based access
# ServerName your-domain.com

ErrorLog ${APACHE_LOG_DIR}/error.log
CustomLog ${APACHE_LOG_DIR}/access.log combined

# SSL Configuration
SSLEngine on

SSLProtocol -all +TLSV1.2
SSLCipherSuite RSA+AESGCM

SSLCertificateFile      /etc/apache2/ssl/apache-selfsigned.crt
SSLCertificateKeyFile   /etc/apache2/ssl/apache-selfsigned.key

<FilesMatch "\.(cgi|shtml|phtml|php)$">
SSLOptions +StdEnvVars
</FilesMatch>
<Directory /usr/lib/cgi-bin>
SSLOptions +StdEnvVars
</Directory>

# Optional security headers
Header always set X-Frame-Options DENY
Header always set X-Content-Type-Options nosniff
Header always set X-XSS-Protection "1; mode=block"

# Optional SSL settings (hardened)
SSLProtocol all -SSLv3 -TLSv1 -TLSv1.1
SSLCipherSuite HIGH:!aNULL:!MD5
SSLHonorCipherOrder on
</VirtualHost>
</IfModule>
Save and exit (Ctrl+O, Enter, then Ctrl+X).
Note
SSLProtocol -all +TLSV1.2 ,SSLCipherSuite RSA+AESGCM these two lines are support for TLSV1.2 protocol.
If you comment these two lines then it support for TLSV1.3 protocol.
Step-10: Restart Apache
test:~$ sudo systemctl restart apache2
Step-11: Test Your Server
Open a browser and go to:
Note
You’ll see a warning that the certificate is not trusted — this is expected with a self-signed certificate. You can proceed anyway.
After you observe the your index.html page.
10.91.239.125 is the server IP address
Step -1 : obtain the custom webserver’s certificate
test:~$ echo | openssl s_client -showcerts -connect 10.91.239.125:443
This will show you the certificate chain the custom webserver is presenting.copy the certificate from the output (the blocking starting with —-begin certificate—-and ending with —END CERTIFICATE—).
save it to a file,e.g., ownwebserver.crt
step-2 : ADD the custom webserver certificate to trusted CA store
1.copy the custom webserver certificate to /usr/local/share/ca-certificates/
test:~$ sudo cp ownwebserver.crt /usr/local/share/ca-certificates/
2.update the certificate store
test:~$ sudo update-ca-certificates
this will add the custom webserver’s self-signed certificate to the list of trusted certificates.
Note
10.91.239.125 is the IP address of custom webserver.
- 1.Set SSLKEYLOGFILE Environment Variable
Set this environment variable to capture the session keys.
test:~$ export SSLKEYLOGFILE=~/noproxy_sslkeys.log
Note
This tells supported TLS libraries to log pre-master secrets into that file.
This only works if the TLS library used by curl supports it (like OpenSSL with debug support or NSS).
- 2.RUN the curl command
test:~$ curl -v https://10.91.239.125
- 3.Start a Wireshark capture
Open Wireshark.
Select the network interface that your traffic goes through (e.g., eth0, wlan0).
Apply a capture filter if you want, or just start the capture.
Run your curl command while capturing is active.
test:~$ curl -v https://10.91.239.125
- 4.Configure Wireshark to use the SSL key log
Go to Edit > Preferences > Protocols > TLS.
Find the field for:
(Pre)-Master-Secret log filename
Set it to the path of your sslkeys.log file, e.g.,/home/user/noproxy_sslkeys.log
Click OK.
Then,Wireshark will use the session keys to decrypt HTTPS traffic.
- 5.View decrypted traffic
You should now see decrypted HTTP requests and responses in plain text!
FILE NAME |
PATH |
DESCRIPTION |
apache-selfsigned.crt |
/etc/apache2/ssl/apache-selfsigned.crt |
Self-signed public certificate used for local or test HTTPS setups. |
apache-selfsigned.key |
/etc/apache2/ssl/apache-selfsigned.key |
Private key matching apache-selfsigned.crt. Needed for SSL/TLS on the server. |
sslkeylogfile |
/home/user/noproxy_sslkeys.log |
File that stores TLS session keys. Used by Wireshark to decrypt HTTPS traffic when SSLKEYLOGFILE is set. |
ownwebserver.crt |
/home/user/ownwebserver.crt |
Public certificate for your web server. Presented to clients during HTTPS connections. |
FAQs
Reference links